Perfect DIY nails: a step by step guide
Since all of our nail salons are temporarily closed due to lockdown, our talons are currently looking a little sad and neglected. However, worry no more! Follow these simple steps to achieve salon-worthy nails at home.
@fashion_north♬ Say So – Doja Cat
What you will need:
Glue on false nails
Nail clippers
Nail file
Small brush
Lint-free wipes
Gel UV lamp
Clear gel polish
Glitter
Step 1
Spend time in picking the right sizes of the false nails to fit your natural nails perfectly. Apply a small amount of nail glue to natural nail and to underside of the false nail. Gently push the false nails underneath the cuticles for a natural growth look.
Step 2
Clip nails to desired length and file to desired shape. I chose short and square nails as it has always been my favourite nail look. Then, buff all shine from the nail away. Doing this provides a grip for the gel polish.
Step 3
Apply clear gel polish to each nail, then cure under the Gel UV lamp for 60 seconds. After curing, the gel polish will be dry but slightly tacky, meaning the glitter will be able to stick.
Step 4
Using a small brush, dip into the glitter and brush onto the nails, switching between dabbing on and sweeping on. This way, you will be able to cover all of the space on the nail with the glitter.
Step 5
Lastly, add more clear gel polish onto the top of the glitter to seal it down. Cure again for 60 seconds. Use the lint-free wipes to gently wipe away the sticky residue.
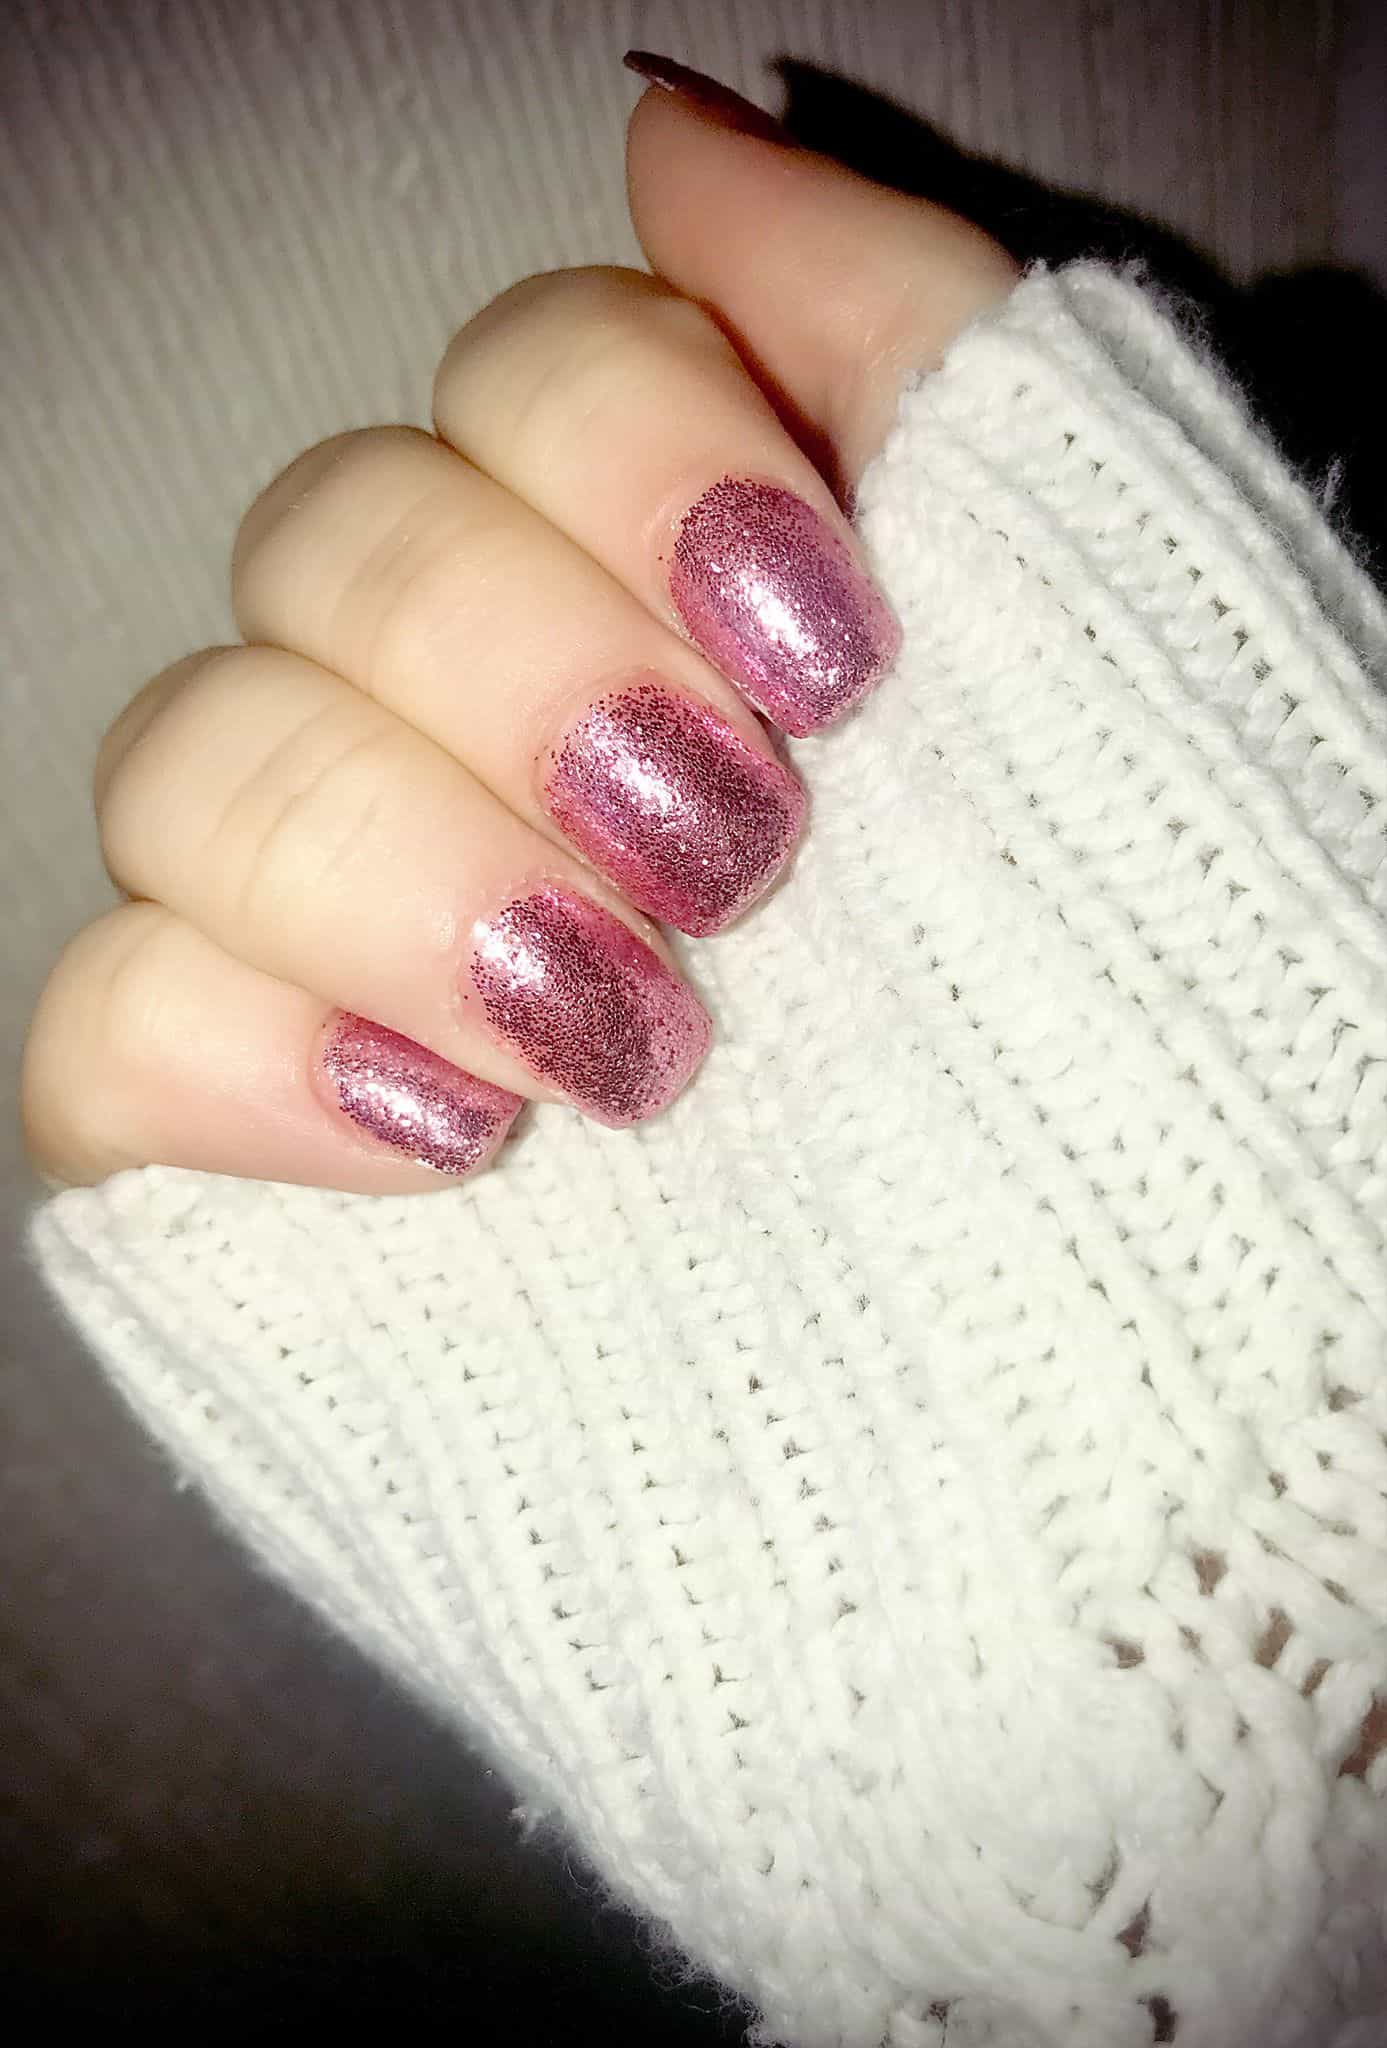
Then voilà! You have created perfect DIY nails at home.
Photo credit: Holly Allton